
Canon MX922 Instruction Manual: A Comprehensive Guide
Welcome! This comprehensive guide unlocks the full potential of your Canon MX922, offering detailed instructions and support for seamless operation and optimal performance.
The Canon PIXMA MX922 is a highly capable All-in-One inkjet printer, designed to meet the diverse needs of both home and small office environments. This manual serves as your primary resource for understanding and utilizing its extensive features. It’s a versatile device offering high-quality printing, scanning, and copying functionalities.
Whether you’re a first-time user or seeking to explore advanced settings, this guide provides step-by-step instructions and troubleshooting advice. You’ll discover how to connect wirelessly, manage ink, and perform maintenance for consistently reliable performance. Explore video tutorials and downloadable manuals for enhanced support, ensuring a smooth and productive experience with your Canon MX922.
Understanding the Package Contents
Upon opening your Canon MX922 package, carefully verify all included components. You should find the PIXMA MX922 printer itself, along with a set of initial ink cartridges – typically black, cyan, magenta, and yellow. Essential documentation is included: a setup guide, safety information leaflet, and often a warranty card.
Additional items may include a power cord, USB cable for direct computer connection, and software installation CD/DVD. Some packages also contain sample paper for initial testing. Retain all packaging and documentation for potential warranty claims or future reference. Refer to the included literature for a complete and detailed list of contents.
Initial Setup and Installation
Begin by unpacking the Canon MX922 and removing all protective tape and packaging materials. Connect the power cord to the printer and a wall outlet. Insert the ink cartridges following the on-screen prompts – do not force them. Load paper into the paper tray, ensuring it’s properly aligned.
Next, install the software from the included CD or download it from the Canon website. The installation wizard will guide you through connecting the printer to your computer, either via USB or wirelessly. Follow the instructions carefully to complete the setup process and ensure proper functionality.
Connecting to a Computer (USB)
Ensure your computer is powered on. Locate the USB port on the rear of the Canon MX922 printer. Connect the USB cable (not always included – check your package) to both the printer and an available USB port on your computer.
Your computer should automatically detect the printer and begin installing the necessary drivers. If not, run the setup program from the installation CD or downloaded software. Follow the on-screen prompts to complete the USB connection. Once installed, you can select the Canon MX922 as your default printer.
Wireless Network Setup
Access the printer’s control panel and navigate to the wireless setup wizard. Select your wireless network name (SSID) from the available list. Enter your network password (case-sensitive) when prompted. Ensure the printer is within range of your wireless router for a stable connection.
The MX922 will attempt to connect to your network. A successful connection will be indicated on the printer’s display. You may need to install the printer software on your computer to fully utilize the wireless functionality. Refer to Canon’s website for detailed video tutorials.

Navigating the Printer’s Control Panel
The Canon MX922 features a user-friendly control panel with a color touchscreen display. Use the touchscreen to access various settings, including printing, scanning, copying, and network configuration. The Home screen provides quick access to frequently used functions. Explore the menu options by tapping the icons on the display.
Utilize the left and right arrow buttons to navigate between screens. The OK button confirms selections, while the Cancel button returns to the previous menu. Familiarize yourself with the layout for efficient printer operation and customization.
Basic Printing Operations
To print documents with your Canon MX922, ensure the printer is powered on and connected to your computer. Open the document you wish to print and select “Print” from the application’s file menu. Choose the Canon MX922 as your printer, then adjust settings like paper size, print quality, and number of copies.
For photo printing, select the appropriate paper type in the printer settings for optimal results. Utilize the printer’s auto-photo mode for enhanced color accuracy and detail. Preview your print before finalizing to ensure desired output.
Printing Documents
Initiating document printing with the Canon MX922 is straightforward. After opening your desired file, select the “Print” option. From the printer selection menu, choose your Canon MX922. Carefully review and adjust print settings, including paper size (Letter, A4, etc.), orientation (Portrait or Landscape), and print quality (Standard, High).
Consider utilizing the “Multiple Pages per Sheet” option to conserve paper. Preview the print layout before confirming to avoid errors. Ensure sufficient paper is loaded in the paper tray for uninterrupted printing. The MX922 supports various document formats.
Printing Photos
To achieve vibrant photo prints with your Canon MX922, select “Print” from your image viewer. Choose the MX922 as your printer and access the print settings. Crucially, select the appropriate paper type – glossy photo paper yields the best results. Adjust the print quality to “High” for maximum detail and color accuracy.
Explore options like borderless printing for a professional finish. Utilize Canon’s image optimization features for enhanced color and contrast. Ensure the correct paper size is selected. Preview the image before printing to confirm layout and settings. Enjoy stunning, high-quality photo prints!

Scanning and Copying Functions
The Canon MX922 excels at both scanning and copying. To scan, utilize the printer’s control panel or Canon’s software on your computer. Select your desired resolution and file format (JPEG, PDF, etc.). For copying, simply place the document on the glass and select the “Copy” function.
Adjust settings like copy darkness and paper type as needed. The MX922 supports both color and black & white copying. Scanning directly to a computer allows for easy digital archiving. Explore advanced features within the software for enhanced scanning and copying options.
Scanning Documents to a Computer
Initiate scanning to your computer via the Canon MX922’s control panel or dedicated software. Ensure your computer and printer are connected, either via USB or a wireless network. Select “Scan” on the printer, then choose your computer as the destination.
Within the software, customize scan settings like resolution, color mode, and file type (PDF, JPEG, etc.). Preview the scan before finalizing. The MX922 offers options for single or multiple document scanning. Save the scanned file to your desired location on your computer for easy access and organization.
Making Copies
To make copies with your Canon MX922, place the original document on the scanner glass or within the Automatic Document Feeder (ADF). On the printer’s control panel, select the “Copy” function. Adjust copy settings like the number of copies, paper size, and copy quality (standard, high).
Utilize features like two-sided copying (duplex) for paper saving. Preview the copy before printing to ensure proper alignment and settings. Press the “Start” button to initiate the copying process. The MX922 efficiently produces clear and accurate copies of your documents.
Advanced Features and Settings
The Canon MX922 boasts several advanced features to enhance your printing experience. Explore Duplex Printing for automatic two-sided printing, reducing paper consumption and creating professional documents. The Automatic Document Feeder (ADF) streamlines copying and scanning of multi-page documents.
Customize settings within the printer’s menu, including paper type, print quality, and color adjustments. Utilize wireless connectivity for convenient printing from various devices. Explore advanced scanning options like OCR (Optical Character Recognition) for converting scanned documents into editable text.
Duplex Printing (Two-Sided Printing)
Enable Duplex Printing on your Canon MX922 to automatically print on both sides of the paper, saving resources and reducing paper waste. Access this feature through the printer driver settings on your computer. Select “Two-Sided Printing” or a similar option before initiating the print job.

Choose binding options like long-edge or short-edge binding depending on your document’s layout. Ensure your paper type is compatible with duplex printing for optimal results. This feature is ideal for reports, documents, and drafts, promoting eco-friendly printing practices.
Automatic Document Feeder (ADF) Usage
Utilize the ADF on your Canon MX922 for convenient hands-free scanning, copying, or faxing of multi-page documents. Load your papers into the ADF tray, ensuring they are aligned and not curled. Select the desired function – scan, copy, or fax – and specify the number of copies or scan settings.
Adjust paper guides to fit the document size securely. The ADF supports various paper sizes and types. Monitor the process as the printer automatically feeds and processes each page, streamlining your workflow and saving valuable time.
Troubleshooting Common Issues
Encountering problems? This section addresses frequent issues with your Canon MX922. Paper jams are easily resolved by carefully removing the stuck paper, following the printer’s display prompts. Connectivity problems, whether USB or wireless, often require checking cable connections or re-establishing the network connection through the printer’s setup menu.
Restarting the printer and computer can often resolve temporary glitches. Refer to the detailed troubleshooting section within the full Canon MX922 manual for more complex issues and specific error codes.

Paper Jams
Paper jams can occur during printing or copying. First, power off the printer and open the appropriate access panel (rear tray, cassette tray, or ADF). Gently remove any visible jammed paper, avoiding tearing. Check for small scraps that may be hidden within the printer.
Ensure you’re using supported paper types and weights. Refer to the printer’s display for specific instructions and diagrams. Avoid using excessive force when removing paper to prevent damage. Restart the printer after clearing the jam.
Connectivity Problems
Experiencing connectivity issues? First, verify the printer is powered on and within range of your Wi-Fi network. Ensure the correct network is selected on the printer’s control panel. Restart both your printer and your router. Check the USB cable connection if using a wired connection.
Confirm your computer recognizes the printer. Reinstall the printer driver from the Canon website if necessary. Consult Canon’s support resources for troubleshooting specific error codes displayed on the printer. Firewall settings may also interfere with connectivity.
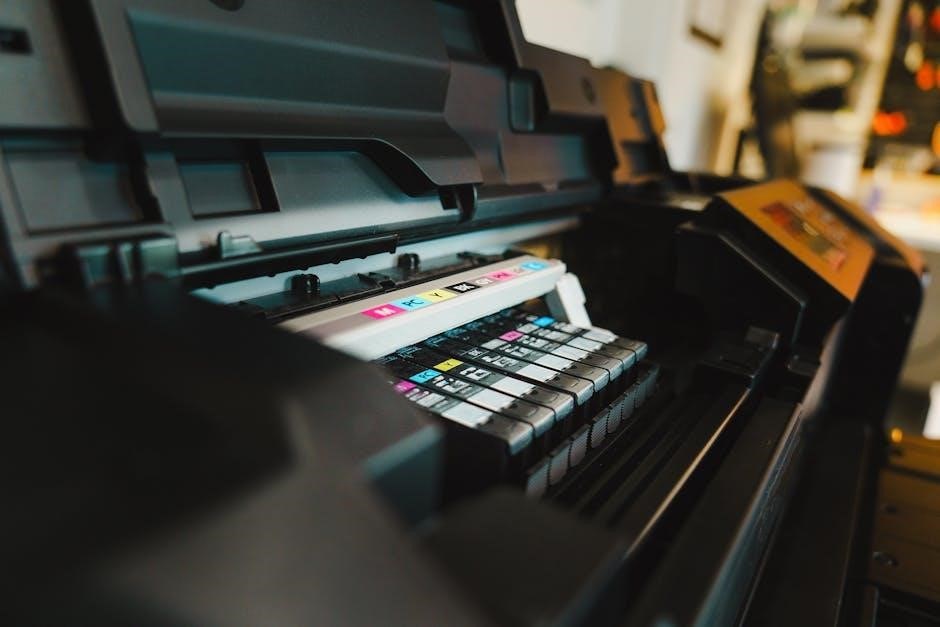
Ink Cartridge Management
Maintaining optimal print quality relies on proper ink cartridge management. Regularly check ink levels via the printer’s control panel or the Canon printer software on your computer. Low ink warnings indicate it’s time for replacement. Use genuine Canon ink cartridges for best results and to avoid potential printer damage.
To replace cartridges, access the printer’s interior following the on-screen prompts. Ensure the correct cartridge type is installed in each slot. Avoid touching the electrical contacts on the cartridges. Proper disposal of used cartridges is crucial; check local recycling programs.
Checking Ink Levels
Monitoring your Canon MX922’s ink levels is simple and crucial for preventing interrupted printing. Access the ink level status directly from the printer’s LCD control panel; navigate through the menu to find the “Ink Levels” option. Alternatively, use the Canon printer software installed on your computer.

The software displays a visual representation of each cartridge’s remaining ink. Pay attention to warning messages indicating low ink. Note that ink usage varies depending on print content and settings. Regular checks ensure you’re always prepared with replacement cartridges, avoiding delays.
Replacing Ink Cartridges
When the printer indicates low ink, replacing the cartridges is straightforward. First, ensure the printer is powered on. Open the printer cover to access the cartridge bay. The printer will likely move the cartridge holder to the center. Gently remove the empty cartridge by pressing down on it to release the lock.
Next, unwrap the new cartridge, removing the protective tape. Insert the new cartridge into the correct slot, ensuring it clicks into place. Close the printer cover. The printer will automatically align and charge the new cartridge, preparing it for use. Follow on-screen prompts if any appear.
Cleaning and Maintenance
Regular cleaning ensures optimal print quality and extends the life of your Canon MX922. Periodically wipe the exterior with a soft, damp cloth. Avoid using harsh chemicals or abrasive cleaners. For print head cleaning, utilize the printer’s built-in cleaning function accessible through the control panel or printer driver on your computer.
Run the cleaning cycle when you notice streaking or faded prints. Additionally, inspect and clean the scanner glass with a lint-free cloth and scanner cleaning solution. Proper maintenance prevents paper jams and ensures consistent performance, keeping your MX922 functioning reliably.
Downloading the Canon MX922 Manual
Access a digital copy of your Canon MX922 manual easily online. Visit websites like Zofti (https://en.zofti.com/canon-pixma-mx920-users-guide/download) to download the complete user guide in PDF format. Alternatively, explore Canon’s official website for available manuals and support resources. These digital versions offer convenient access to troubleshooting tips, detailed instructions, and specifications.
Downloading the manual allows you to search for specific information quickly and efficiently. Multiple file formats, including PDF, JP2 ZIP, and TORRENT downloads, may be available from various online sources, offering flexibility in how you access the documentation.

Resources and Support
For additional assistance with your Canon MX922, numerous online resources are readily available. Explore Canon’s official website for FAQs, troubleshooting guides, and downloadable software updates. YouTube hosts helpful video tutorials demonstrating setup, printing, and advanced features – search for “Canon Pixma MX922 setup” or similar terms.
Websites like Zofti provide downloadable manuals in various formats. The Manual Library also offers archived versions. Remember to check upload dates (e.g., September 1, 2020, July 2, 2021) to ensure you have the most current information. Don’t hesitate to utilize these resources for a smoother user experience.