

Tent setup manuals provide comprehensive guides for assembling and maintaining tents‚ ensuring safety and durability. They offer step-by-step instructions‚ from preparation to final adjustments‚ and include troubleshooting tips.
1.1 Importance of Following Instructions
Following tent setup instructions ensures safety‚ proper structural integrity‚ and longevity of the tent. Missing steps can lead to poor assembly‚ potential damage‚ or even safety hazards. Instructions provide clear‚ manufacturer-recommended methods to avoid common mistakes. They also help maintain warranty validity and ensure all features function as intended. By adhering to the manual‚ users can achieve a secure‚ weather-tight setup and enjoy a trouble-free camping experience. Proper assembly is key to withstanding environmental stresses like wind and rain. Always read and follow the instructions carefully to maximize safety and performance.
1.2 Brief Overview of the Setup Process
The setup process begins with selecting a suitable location and laying out the tent body. Next‚ poles are attached and connected to form the frame. The tent is then stood up and secured to the ground using stakes and ropes. After attaching the rainfly and tightening it‚ final adjustments are made to ensure all connections are tight and fabric is properly tensioned. This systematic approach ensures stability and weather resistance‚ allowing for a safe and comfortable outdoor experience. Each step is designed to be straightforward‚ even for those new to tent assembly.
Pre-Setup Preparation
Pre-setup involves selecting a clear‚ level site‚ unpacking and organizing components‚ and gathering essential tools like stakes and ropes to ensure a smooth tent assembly process.
2.1 Choosing the Right Location
Selecting a suitable location is crucial for safe and effective tent setup. Look for a level‚ dry area free from rocks‚ branches‚ and sharp objects. Ensure the ground is firm to prevent tent stakes from loosening. Avoid low-lying areas to reduce water accumulation risks during rain. If camping in a designated site‚ use the provided tent pad for stability. Clear any debris before laying down a tarp or footprint to protect the tent’s floor. Proper site selection ensures a secure and comfortable camping experience.
2.2 Unpacking and Organizing Components
Begin by carefully unpacking all tent components‚ ensuring no items are missing or damaged. Lay out the poles‚ tent body‚ rainfly‚ stakes‚ and guy lines on a clean‚ dry surface. Organize the parts to avoid confusion during assembly. Use a tarp or footprint to protect the tent floor and keep components clean. Check the instruction manual to identify each piece and verify the completeness of the kit. This step ensures a smooth setup process and helps prevent delays or issues during assembly.
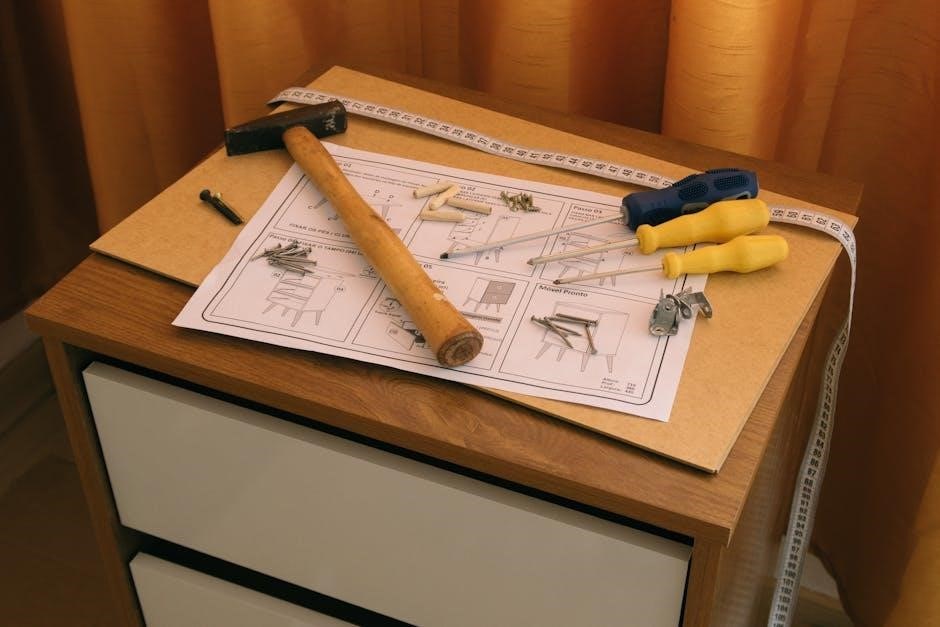
2.3 Essential Tools and Accessories
Having the right tools and accessories is crucial for a successful tent setup. Essential items include a sturdy hammer or mallet for driving stakes‚ a screwdriver for tightening connections‚ and gloves for protecting your hands. A tarp or footprint is recommended to protect the tent floor from moisture and abrasion. Ensure you have all necessary components like poles‚ stakes‚ ropes‚ and clips. Additionally‚ a repair kit with patches and a seam sealer can be useful for unexpected tears or leaks. Keep all tools and accessories organized and within reach to streamline the setup process.

Tent Setup Process
Begin by laying out the tent body‚ then attach poles to the corners and connect them. Stand the tent upright and secure it firmly to the ground.
3.1 Laying Out the Tent Body
Laying out the tent body is the first physical step in setting up your tent. Start by finding a flat‚ level surface and clearing it of debris. Unfold the tent body and place it on the ground‚ ensuring it is oriented correctly. If using a tarp or footprint‚ lay it down first to protect the tent’s bottom. Align the tent’s corners with the tarp’s edges for proper coverage. Attach the tent poles to the body using the clips or sleeves provided. Make sure all edges are smooth and fabric is evenly spread to avoid wrinkles. This step ensures a stable foundation for the rest of the setup process.
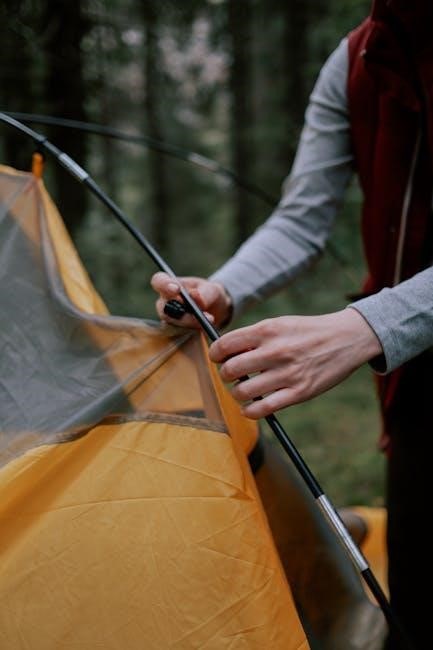
3.2 Attaching Poles to the Tent
Attaching poles to the tent is a critical step. Identify the poles and match them to the tent’s corners or sleeves. Insert the pin into one end of the pole and attach it to the tent’s corner or sleeve. Repeat for all poles‚ ensuring each is securely connected. For clip-style attachments‚ snap the clips onto the poles and tighten. Make sure all connections are snug and properly aligned to maintain structural integrity. Double-check each attachment point to ensure stability and prevent potential issues during use.
3.3 Connecting Poles Together
Connect the poles by aligning the ends and inserting the pin into the opposite pole’s receptacle. Ensure each connection is secure and fully seated. For multi-section poles‚ attach them in sequence‚ starting from one corner and working your way around. Use the clips or hooks on the tent body to hold the poles in place temporarily. Double-check that all connections are tight and properly aligned to maintain the tent’s structural integrity. Make sure no poles are bent or misaligned‚ as this could compromise the tent’s stability and safety during use.
3.4 Standing the Tent Up
Once the poles are connected and attached to the tent body‚ carefully lift the tent by the hubs or designated lifting points. Ensure even distribution of weight to avoid straining any single pole. Stand the tent upright‚ starting from one corner and moving around the perimeter. Use stakes to secure the base as you go to maintain balance. Make sure the tent is fully upright before moving on to securing it to the ground. Avoid applying excessive force‚ as this could damage the poles or fabric.
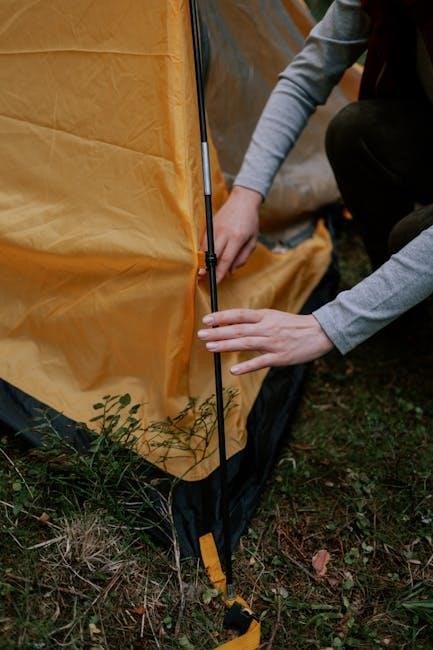
3.5 Securing the Tent to the Ground
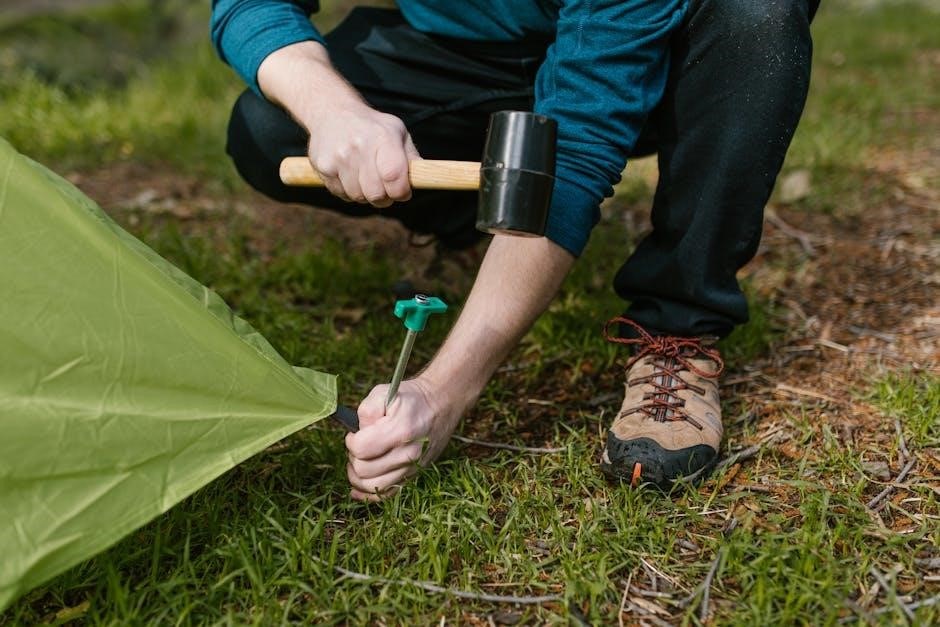
To ensure stability‚ drive stakes through the tent’s stake-out loops at a 45-degree angle‚ securing the tent firmly to the ground. Start with the corners‚ then move to the sides‚ tightening the fabric as you go. Use guy lines for additional support‚ anchoring them to nearby stakes. Check that all connections are tight and the tent stands upright without sagging. Properly securing the tent ensures it can withstand wind and weather conditions‚ providing a safe and sturdy shelter.

Attaching the Rainfly
Place the rainfly over the tent‚ aligning it with the tent body. Secure it using clips or hooks‚ ensuring a snug fit for weather protection.
4.1 Placing the Rainfly Over the Tent
Start by draping the rainfly evenly over the tent‚ ensuring proper alignment with the tent body. Match the rainfly’s corners to the tent’s roof peaks for a snug fit. Use the built-in clips or hooks to secure it to the poles‚ tightening gently to avoid fabric stress. Make sure the rainfly lies flat and taut‚ with no sagging areas. This step is crucial for weatherproofing and maintaining structural integrity. Always refer to the manual for specific attachment points and tightening techniques to ensure optimal coverage and protection from the elements.
4.2 Securing the Rainfly with Clips
Attach the rainfly to the tent frame using the provided clips or hooks. Ensure each clip is securely fastened to prevent wind damage or water seepage. Start at the top and work your way down‚ tightening evenly to maintain fabric tension. Avoid over-tightening‚ which may strain the poles or fabric. For additional stability‚ connect guy lines from the rainfly to ground stakes at the corners. This ensures a tight‚ weatherproof seal and enhances the tent’s overall durability during harsh weather conditions. Properly securing the rainfly is essential for maintaining the tent’s structural integrity and performance.
4.3 Tightening the Rainfly Fabric
After securing the rainfly with clips‚ tighten the fabric by adjusting the straps or buckles around the tent’s perimeter. Pull taut to eliminate wrinkles and sagging areas‚ ensuring even tension. Avoid over-tightening‚ as this may cause stress on the poles or fabric. For optimal weather resistance‚ make sure the rainfly extends beyond the tent’s edges and lies flat. Use tensioning straps on the sides and rear to achieve a snug fit. Properly tightened fabric prevents water pooling and enhances the tent’s stability in windy conditions‚ ensuring a secure and dry shelter.

Final Adjustments
Ensure all connections are secure‚ stakes are tightly anchored‚ and fabric tension is even. Make final tweaks to guarantee a stable and weather-resistant tent setup.
5.1 Tightening All Connections
Tightening all connections is crucial for a stable tent setup. Start by ensuring pole ends are securely locked into the top crown connectors. Check side clips and hooks for a snug fit‚ avoiding loose parts. Use the included wrench to tighten any bolts or nuts. Double-check the rainfly attachments and stake loops for proper alignment. Systematically go through each connection‚ applying even pressure to prevent over-tightening. Finally‚ inspect the entire structure to confirm all components are firmly secured and the fabric is taut but not overly strained. This step ensures your tent remains durable and weather-resistant.
5.2 Ensuring Proper Fabric Tension
Ensuring proper fabric tension is vital for a stable and durable tent setup. Start by adjusting the webbing and tensioning buckles to eliminate any sagging or loose areas. Pull the fabric taut but avoid over-tightening‚ which could damage the material. Check the rainfly and tent body for even tension‚ ensuring no wrinkles or flapping sections. Use stakes to secure the fabric tightly to the ground‚ working systematically around the tent. Proper tension prevents water pooling and enhances the tent’s structural integrity‚ providing a safe and comfortable shelter in various weather conditions.
5.3 Final Stake and Rope Tightening
After setting up the tent‚ perform a final check of all stakes and ropes to ensure maximum stability. Tighten any loose stakes and adjust the ropes to maintain even tension across the fabric. Use guy lines to secure the rainfly and tent body‚ ensuring no sagging or slack. Walk around the tent to inspect for any areas that may need additional tightening. Properly securing all components guarantees the tent’s structural integrity and prevents damage from wind or weather conditions. This final step ensures a safe and stable shelter for any outdoor adventure.
Tips for the Best Tent Setup
For the best tent setup‚ use a tarp for ground protection‚ maintain door tension‚ and employ guy lines effectively to ensure stability and prevent fabric damage.
6.1 Using a Tarp for Ground Protection
Using a tarp for ground protection is essential to shield your tent from moisture and abrasion. Place the tarp on a clean‚ level surface before setting up your tent. Ensure the tarp is slightly smaller than the tent footprint to avoid extending beyond the edges‚ which could collect water. Secure the tarp with stakes or rocks to keep it in place. This extra layer not only protects the tent floor but also makes cleanup easier. For added durability‚ consider using a purpose-made footprint designed for your tent model.
6.2 Maintaining Door Tension
Maintaining proper door tension is crucial for ensuring your tent remains stable and secure. Always keep the tent doors zipped during setup to maintain fabric tension and prevent flapping. Adjust the guy lines to tighten the door fabric‚ ensuring it is taut but not overly strained. Periodically check the doors and adjust stakes if necessary‚ especially after wind or rain. Proper tension prevents damage to zippers and fabric‚ ensuring longevity and performance of your tent. Regular inspections and adjustments will help maintain a secure and weather-tight shelter.
6.3 Using Guy Lines Effectively
Guy lines are essential for maintaining tent stability and preventing fabric sagging. Attach them to designated loops on the tent body and secure them tightly to ground stakes. Ensure proper tension by pulling the lines taut‚ but avoid over-tightening‚ which can damage the fabric. Position guy lines at a 45-degree angle for optimal support. Regularly inspect and adjust them after setup‚ especially in windy or rainy conditions. Effective use of guy lines enhances tent stability‚ prevents water pooling‚ and ensures a secure camping experience. Properly secured guy lines are vital for withstanding harsh weather conditions.
Post-Setup Inspection
After setting up your tent‚ inspect all stakes‚ rainfly attachments‚ and pole connections to ensure they are secure. Verify fabric tension and tighten any loose ropes or clips for stability.
7.1 Checking for Proper Stakes
Ensure all tent stakes are securely driven into the ground at a 45-degree angle to maximize hold. Check each stake to confirm it’s tightly gripping the ground and not loose. For added stability‚ double-check that stakes are evenly spaced around the tent perimeter. This ensures the tent remains stable in windy conditions and prevents fabric stress. Properly securing stakes is crucial for maintaining structural integrity and ensuring safety during use. Always verify that no stakes are leaning or improperly aligned‚ as this can compromise the tent’s stability.
7.2 Verifying Rainfly Security
After attaching the rainfly‚ inspect all clips and straps to ensure they are tightly secured to the tent poles. Verify that the rainfly fabric is evenly spread and free from sagging or wrinkles. Check that all Velcro attachments and tension straps are properly engaged to maintain a snug fit. Ensure the rainfly is tightly cinched at the tent’s base to prevent water pooling; Additionally‚ confirm that all guy lines are securely staked out to maintain proper tension and prevent the rainfly from flapping in the wind. This ensures optimal water resistance and stability during adverse weather conditions.
7.3 Ensuring All Components Are Secure
After setting up your tent‚ perform a final inspection to ensure all components are securely in place. Check that all stakes are deeply embedded in the ground and tightly holding the tent fabric. Verify that poles are fully connected and standing straight‚ with no signs of bending or weakness. Inspect guy lines to ensure they are taut and properly anchored‚ providing additional stability. Make sure all clips‚ hooks‚ and straps are firmly attached to prevent any part of the tent from coming loose. Re-tighten any connections or adjustment points if necessary. Properly securing all components ensures the tent remains stable and safe‚ even in windy or rainy conditions.

Maintenance and Care
Regularly clean your tent with mild detergent and water‚ avoiding harsh chemicals. Ensure it is completely dry before storage to prevent mold. Store in a cool‚ dry place‚ following the manufacturer’s guidelines for optimal preservation. Always refer to the manual for specific care instructions tailored to your tent model.
8.1 Cleaning the Tent
Cleaning your tent is essential for maintaining its durability and performance. Start by brushing off dirt and debris using a soft-bristle brush. For tougher stains‚ mix mild soap with water and gently scrub the fabric using a sponge or cloth. Avoid using harsh chemicals‚ abrasive cleaners‚ or bleach‚ as they can damage the material. Rinse thoroughly with clean water and allow the tent to air-dry completely. Never machine wash or dry your tent‚ as this can cause irreversible damage to the fabric and waterproof coatings.
8.2 Drying the Tent
Properly drying your tent is crucial to prevent mold‚ mildew‚ and damage to the fabric. After cleaning‚ shake off excess water and lay the tent flat in a well-ventilated‚ shaded area. Avoid direct sunlight‚ as it can cause fading or warping. Use clean towels to blot moisture‚ especially from seams and high-wear areas. Allow the tent to air-dry completely‚ ensuring no damp spots remain. Never fold or store the tent while it’s damp‚ as this can lead to irreversible damage. Always dry the tent thoroughly before storing it to maintain its quality and longevity.
8.3 Storing the Tent
Proper storage is essential to maintain your tent’s condition and longevity. Always clean and dry the tent thoroughly before storing it to prevent mold and mildew. Store the tent in a cool‚ dry place‚ avoiding attics or basements prone to moisture. Use the original storage bag or a breathable fabric bag to allow airflow. Avoid tightly packing the tent‚ as this can cause creases or damage. Store poles and accessories separately to prevent scratching or bending. Check the tent for any damage before storage and address it promptly. Proper storage ensures your tent remains in excellent condition for future use.
Troubleshooting Common Issues
Troubleshooting common tent issues‚ such as water leaks‚ bent poles‚ or torn fabric‚ requires inspecting seams‚ replacing damaged parts‚ and ensuring proper setup. Refer to the manual for fixes or contact manufacturer support for assistance.
9.1 Dealing with Leaks
Identifying and addressing leaks is crucial for maintaining a waterproof tent. Start by inspecting the tent seams and fabric for any visible damage or wear. Apply a waterproof sealant to compromised areas‚ ensuring the tent is completely dry before treatment. For persistent leaks‚ check the rainfly and ground tarp connections‚ ensuring they are securely attached. Avoid using abrasive cleaners‚ as they may damage the fabric. Always follow the manufacturer’s instructions for recommended sealants and repair methods. Regular maintenance can prevent future issues‚ ensuring your tent remains dry and secure in wet conditions.
9.2 Fixing Bent or Damaged Poles
If a tent pole is bent or damaged‚ assess the extent of the damage first. For minor bends‚ carefully straighten the pole by hand or with gentle pressure. Avoid using excessive force‚ as this may cause further damage. For severely bent or broken poles‚ replace the damaged section using a pole repair sleeve or splint. Secure the sleeve tightly around the break to restore structural integrity. If the pole is beyond repair‚ order a replacement from the manufacturer. Always disassemble the tent before attempting repairs to avoid further damage. Follow the manufacturer’s guidelines for proper repair techniques to ensure the tent remains stable and secure.
9.3 Repairing Tears in the Fabric
To repair tears in the tent fabric‚ start by assessing the size and location of the damage. Clean the area around the tear to ensure proper adhesion. Apply a patch specifically designed for tent fabric‚ using a tent repair kit or strong adhesive tape. For larger tears‚ use a seamless repair strip or fabric glue. Allow the adhesive to dry completely before testing the repair; If the tear is along a seam‚ reinforce it with additional stitching or seam sealant to prevent further damage. Regular inspections and timely repairs can extend the lifespan of your tent and maintain its weather resistance.
Additional Resources
Access online manuals‚ setup videos‚ and manufacturer support for detailed tent assembly guidance and troubleshooting tips‚ ensuring a successful and stress-free camping experience.
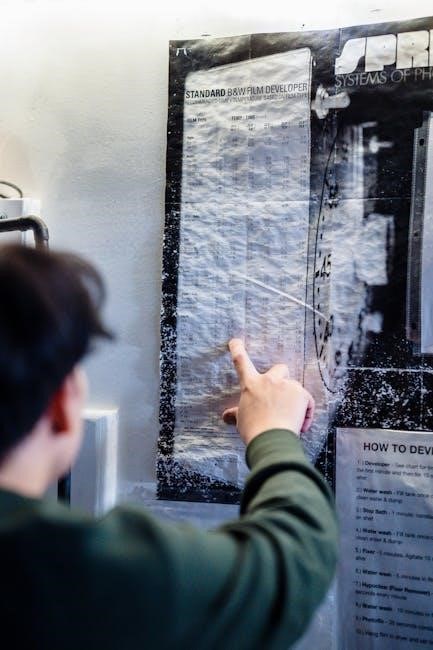
10.1 Accessing Online Manuals
Accessing online manuals for tent setup is straightforward. Visit the manufacturer’s official website‚ such as Coleman‚ Eureka‚ or Celina Tent‚ and navigate to the product page for your specific tent model. Look for a “Setup” or “Downloads” section‚ where PDF manuals are typically available. If you’re unsure of the model‚ use the search bar or contact customer support for assistance. Many brands also provide detailed assembly guides and troubleshooting tips online. Ensure you download the correct manual for your tent size and type to avoid confusion during setup. This resource is invaluable for first-time users or those who’ve misplaced their physical copy.
10.2 Watching Setup Videos
Watching setup videos is an excellent way to understand tent assembly visually. Many manufacturers‚ like Core Equipment and American Tent‚ offer instructional videos on their websites or YouTube channels. These videos demonstrate each step‚ from unpacking to securing stakes and guy lines. They often highlight common mistakes to avoid‚ such as improper pole connections or uneven ground preparation. Videos are particularly helpful for visual learners or those who find written instructions confusing. Additionally‚ some videos cover specific models‚ ensuring the guidance is tailored to your tent’s unique features. This resource complements manuals‚ making the setup process smoother and more intuitive;
10.3 Contacting Manufacturer Support
Contacting manufacturer support is a reliable way to address specific questions or issues with your tent setup. Many brands‚ such as Coleman and Core Equipment‚ provide customer service through phone‚ email‚ or live chat. Visiting the manufacturer’s official website often leads to a support section where you can find contact details or submit a query. This resource is especially useful for troubleshooting unique problems or clarifying unclear instructions. Manufacturer support teams can offer tailored guidance‚ ensuring your tent is set up correctly and safely. Reaching out to them can save time and frustration‚ especially for complex setups or repairs.
Properly following the manual ensures your tent is secure‚ durable‚ and ready for any weather. This guide has covered all key steps for a successful setup.
Practice makes perfect; the more you set up your tent‚ the more efficient you’ll become. Always double-check stakes and ropes for stability and safety.
11.1 Summary of Key Steps
Setting up your tent involves several crucial steps: laying out the tent body‚ attaching poles‚ securing the rainfly‚ and tightening all connections. Always start by preparing a level site and using a tarp for ground protection. Follow the manual’s instructions to assemble poles and clip them to the tent. Ensure the rainfly is properly secured and adjust fabric tension for stability. Stake the tent firmly and tighten ropes to withstand wind. Regular maintenance‚ such as cleaning and drying‚ will extend the tent’s lifespan. By adhering to these steps‚ you’ll ensure a safe and enjoyable camping experience.
11.2 Encouragement for Practice
Practicing tent setup is key to mastering the process and ensuring a smooth camping experience. Start with small steps‚ like unpacking and organizing components‚ before moving on to more complex tasks. Be patient with yourself‚ as setting up a tent can be challenging at first. With each practice session‚ you’ll build confidence and skill. Remember‚ the more you practice‚ the more familiar you’ll become with the instructions and the tent’s design. Encourage yourself to keep trying‚ and soon you’ll be setting up your tent like a pro. Happy camping!
11.3 Final Safety Reminders
Always follow the tent instructions manual to ensure a safe setup. Choose a level‚ stable site away from sharp objects. Secure poles and stakes tightly to prevent collapse. Use guy lines to reinforce stability in windy conditions. Regularly inspect fabric and poles for damage. Store the tent dry to avoid mold. Never set up in extreme weather without proper preparation. Double-check all connections before use. Following these guidelines ensures a safe and enjoyable camping experience. Remember‚ safety is key to making your outdoor adventures memorable and stress-free.