

Black & Decker 12-Cup Manual Coffee Maker: A Comprehensive Guide
This guide details the operation of the BLACK+DECKER 12-Cup Coffeemaker (CM2046 Series), offering instructions for safe, effective brewing and maintenance.
The Black & Decker CM2046 Series represents a reliable and user-friendly approach to home coffee brewing. This 12-cup coffee maker, often found as a thermal programmable model, is designed for convenience and consistent results. Documents available online detail its functionality, emphasizing ease of use for both initial setup and daily operation.
This series caters to those seeking a straightforward coffee experience, offering features like programmable auto-brew and a pause-and-serve function. User manuals highlight important safety precautions and provide a comprehensive overview of the coffee maker’s components. The CM2046 is built for efficiency, delivering approximately 5oz per cup, and is available with multilingual instructions, including Spanish and French.
Understanding the Key Features
The Black & Decker CM2046 Series boasts several key features designed for optimal coffee brewing. Central to its functionality is the 12-cup capacity, ideal for families or frequent coffee drinkers. Programmability allows users to set auto-brew times, ensuring a fresh pot is ready upon waking. The thermal carafe maintains coffee temperature for extended periods without compromising flavor.
A convenient pause-and-serve feature enables users to pour a cup mid-brew without making a mess. Safety features, detailed in the user manual, are paramount. The machine’s components are designed for easy cleaning and maintenance, contributing to its longevity. Understanding these features ensures a satisfying and efficient coffee-making experience.

Setting Up Your Coffee Maker
Proper setup is crucial for optimal performance. This involves an initial cleaning, familiarizing yourself with filling the water reservoir, and preparing the filter basket and carafe.
Initial Cleaning Procedure
Before your first brew, a thorough cleaning is essential to remove any manufacturing residue. Begin by washing the carafe, lid, and filter basket with warm, soapy water. Rinse them completely, ensuring no soap remains.
Next, fill the water reservoir to its maximum capacity with fresh, clean water. Place the empty carafe into position on the warming plate. Run a full brewing cycle without adding any coffee grounds.
This initial cycle effectively flushes out the internal components of the coffee maker. After the cycle completes, carefully discard the hot water from the carafe. Repeat this process one more time with a fresh reservoir of water. This ensures a pristine brewing environment for your first, and all subsequent, pots of coffee.
Water Reservoir Filling Instructions
The water reservoir is located at the rear of the Black & Decker coffee maker. To fill, carefully remove the reservoir from the unit – it typically lifts straight up. Use fresh, cold water; filtered water is recommended for optimal coffee flavor.
The reservoir is clearly marked with cup level indicators, allowing you to easily measure the desired amount of water. Remember that one cup, as indicated on the reservoir, is approximately 5 ounces. Fill the reservoir to the corresponding level based on the number of cups you intend to brew.
Avoid overfilling beyond the maximum fill line. Once filled, securely reattach the reservoir to the coffee maker, ensuring it’s properly seated before starting the brewing process.
Filter Basket and Carafe Preparation
Before brewing, prepare the filter basket and carafe. Locate the swing-out filter basket; ensure it’s securely in place. Insert a paper filter – typically a cone or basket-shaped filter, depending on your preference – into the basket.
The carafe, usually glass, should be clean and dry. Place the carafe securely onto the warming plate. Always use the correct carafe for your model to ensure proper brewing and prevent accidents.
Double-check that the carafe lid is properly positioned. This helps maintain coffee temperature and prevents spills. A properly prepared carafe and filter basket are essential for a clean and efficient brewing cycle.
Brewing Coffee: A Step-by-Step Guide
Follow these simple steps for a perfect brew! Add water to the reservoir, insert a filter with grounds, and press the power button to begin.
Adding Coffee Grounds: Quantity and Type
Determining the correct amount of coffee grounds is crucial for optimal flavor. Generally, one level scoop (approximately 5 ounces) of ground coffee per 12-cup capacity is recommended, but adjust to your preference.
The type of grind matters too. A medium grind is typically best for drip coffee makers like the Black & Decker CM2046 series. Too fine a grind can lead to over-extraction and a bitter taste, while a coarse grind may result in weak coffee.
Experiment with different roasts and origins to discover your ideal cup. Pre-ground coffee is convenient, but freshly ground beans offer superior aroma and flavor. Ensure the grounds are evenly distributed within the filter basket for consistent brewing.
Selecting Brew Strength (If Applicable)
The Black & Decker CM2046 series coffee maker does not feature a dedicated brew strength selection. Unlike some advanced models, it operates with a standard brewing profile, delivering a consistently balanced coffee flavor.
However, you can influence the perceived strength by adjusting the coffee-to-water ratio. Using more coffee grounds per pot will result in a bolder, stronger brew, while using fewer grounds will yield a milder cup.
Experimenting with different coffee types – such as dark roast versus light roast – also significantly impacts the final strength and flavor profile. Remember that grind size also plays a role; a finer grind extracts more flavor, potentially increasing perceived strength.
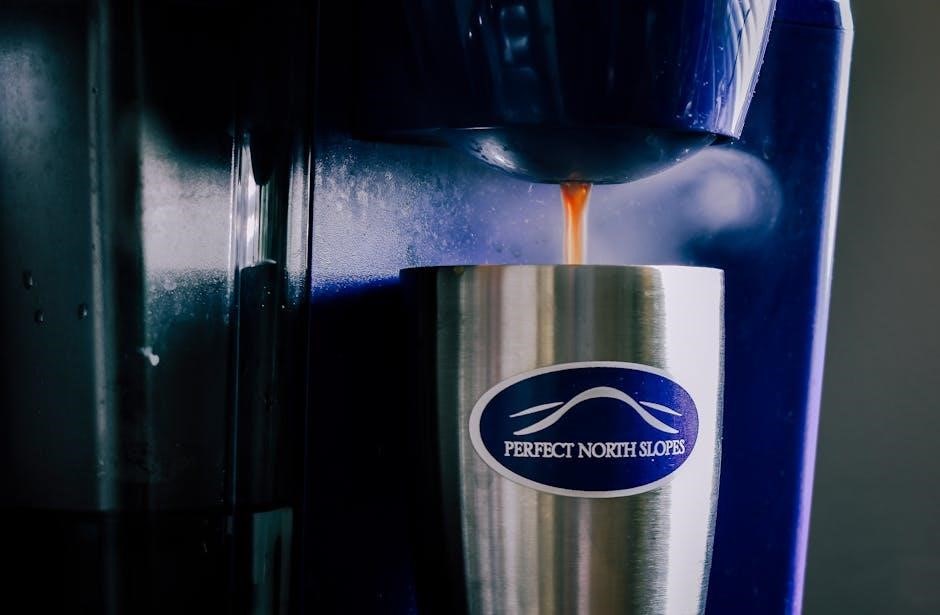
Starting the Brewing Cycle

Once the water reservoir is filled and the filter basket contains coffee grounds, initiating the brewing cycle is straightforward. Ensure the carafe is securely placed on the warming plate. This is crucial for proper operation and to prevent spills.
Locate the power button, typically marked with an “I/O” symbol, and press it to activate the coffee maker. A light indicator will illuminate, confirming the brewing process has begun. The machine will automatically heat the water and begin dripping it through the coffee grounds.
Allow the brewing cycle to complete fully without interruption. This usually takes several minutes, depending on the amount of coffee being brewed. Do not attempt to remove the carafe mid-cycle unless utilizing the ‘Pause and Serve’ feature.
Pause and Serve Feature
The Black & Decker CM2046 series offers a convenient ‘Pause and Serve’ function, allowing you to briefly interrupt the brewing cycle to pour a cup of coffee before the entire pot is finished. This feature is incredibly useful for those eager for a quick caffeine fix.
To utilize this function, gently remove the carafe from the warming plate. The brewing process will automatically pause, preventing further dripping. Allow a few seconds for any remaining coffee to drip from the filter basket before pouring.
Replace the carafe securely on the warming plate within 30 seconds to resume the brewing cycle. Prolonged removal may cause the coffee maker to cease brewing altogether. This feature enhances convenience without compromising the brewing process.

Programming Your Coffee Maker
The Black & Decker CM2046 allows for programmable brewing, enabling you to set a delayed start time for automatically brewed coffee upon waking.
Setting the Clock
Accurate time setting is crucial for the auto-brew function to operate correctly. To set the clock on your Black & Decker CM2046, begin by pressing the “Hour” button. The hour digits will flash on the display. Use the “Hour” and “Minute” buttons to adjust the current hour.
Once the correct hour is displayed, press the “Minute” button. The minute digits will now flash. Again, utilize the “Hour” and “Minute” buttons to set the accurate current minute. After setting both the hour and minute, press either the “Hour” or “Minute” button one final time to confirm your settings.
The clock is now properly set and will maintain the time even during power outages, thanks to its internal memory. Ensure the AM/PM indicator is correct for your time zone.
Programming Auto-Brew Function
To enjoy freshly brewed coffee automatically, utilize the auto-brew feature. First, ensure the clock is accurately set. Press the “Prog” button; the display will flash. Use the “Hour” and “Minute” buttons to set the desired start time for brewing. Confirm your selection by pressing “Prog” again.
Next, verify the auto-brew indicator light is illuminated, confirming the function is activated. Ensure the carafe is properly positioned on the warming plate and that sufficient water and coffee grounds are in their respective compartments.
The coffee maker will automatically begin brewing at the programmed time. To cancel the auto-brew, simply press the “Prog” button once more, extinguishing the indicator light.
Adjusting Auto-Brew Time
Need to change your programmed brew time? It’s a simple process! First, press the “Prog” button once. The previously set brew time will appear on the display, flashing to indicate it’s in edit mode. Use the “Hour” and “Minute” buttons to adjust the hour and minute settings to your new desired start time.
Carefully review the new time displayed before confirming. Press the “Prog” button again to save the updated auto-brew time. The auto-brew indicator light should remain illuminated, confirming the function is still active with the new settings.
Remember to always double-check the time and ensure sufficient coffee and water are prepared for the automatic brewing cycle.

Cleaning and Maintenance
Regular cleaning ensures optimal performance and longevity. Daily rinsing and periodic descaling are crucial for removing mineral buildup and maintaining coffee flavor.
Daily Cleaning Procedures
After each use, unplug the coffee maker and allow it to cool completely. Remove the filter basket and discard the used coffee grounds and filter. Wash the filter basket and carafe with warm, soapy water. Rinse thoroughly to remove any soap residue.
Wipe down the exterior of the coffee maker with a damp cloth. Avoid using abrasive cleaners, as they can damage the finish. The spray head is also removable for cleaning; ensure it’s properly reattached after washing. Regularly inspect the water reservoir for any buildup and wipe clean as needed.
Proper daily cleaning prevents the accumulation of coffee oils and mineral deposits, ensuring a fresh and flavorful brew every time. A clean coffee maker is a happy coffee maker!
Descaling the Coffee Maker
Over time, mineral deposits from water can accumulate inside your Black & Decker coffee maker, affecting its performance and coffee taste. Descaling removes these deposits. Mix equal parts white vinegar and water – typically 6 cups total for a 12-cup model – and pour into the water reservoir.
Place a clean paper filter in the filter basket and start a full brewing cycle. Once complete, discard the vinegar solution and the filter. Run two to three cycles with fresh water only to rinse away any remaining vinegar taste and odor.
Descaling should be done every 1-3 months, depending on water hardness. Regular descaling extends the life of your coffee maker and maintains optimal brewing quality.
Carafe and Filter Basket Cleaning
Regular cleaning of the carafe and filter basket is crucial for maintaining coffee flavor and hygiene. After each use, wash both components with warm, soapy water. Rinse thoroughly to remove all soap residue. The carafe is often dishwasher safe (top rack recommended), but check your model’s specific instructions.
For stubborn coffee stains in the carafe, a mixture of baking soda and water can be effective. Let it sit for a few minutes before scrubbing gently. The filter basket can also be cleaned with a soft brush to remove any lingering grounds.
Ensure both are completely dry before reassembling the coffee maker. Avoid abrasive cleaners, as they can damage the surfaces.
Troubleshooting Common Issues
This section addresses typical problems, like the coffee maker not turning on, slow brewing, or overflow. Refer to this guide for quick solutions!
Coffee Maker Not Turning On
If your Black & Decker 12-Cup Coffee Maker fails to power on, several factors could be at play. First, ensure the unit is securely plugged into a functioning electrical outlet. Test the outlet with another device to confirm it’s providing power.
Next, check the power cord for any visible damage, such as cuts or fraying. A damaged cord presents a safety hazard and should be replaced. Verify the coffee maker’s lid is properly closed, as many models feature a safety mechanism that prevents operation if the lid isn’t securely in place.
If these steps don’t resolve the issue, the unit may have an internal fault. Consult the user manual for specific troubleshooting guidance or contact Black & Decker customer support for assistance. Do not attempt to disassemble or repair the coffee maker yourself, as this could void the warranty and pose a safety risk.
Coffee Brewing Too Slowly
If your Black & Decker 12-Cup Coffee Maker is brewing exceptionally slowly, the most common culprit is mineral buildup. Over time, calcium and other minerals from water can accumulate inside the machine, restricting water flow and slowing down the brewing process. Descaling the coffee maker is crucial to address this issue.
Use a descaling solution specifically designed for coffee makers, following the manufacturer’s instructions carefully. Alternatively, a mixture of equal parts white vinegar and water can be used, but requires thorough rinsing afterward. Ensure the filter basket isn’t overfilled with coffee grounds, as this can also impede water flow.
Finally, check for any obstructions in the water reservoir or spray head. A clogged spray head will significantly slow down brewing. Regular cleaning and descaling will prevent this issue from recurring.
Coffee Overflowing
If your Black & Decker 12-Cup Coffee Maker is overflowing, several factors could be responsible. The most frequent cause is using too much coffee grounds in the filter basket. Ensure you’re adhering to the recommended coffee-to-water ratio – typically one to two tablespoons per cup. Overfilling the basket restricts water flow, leading to overflow.
Another potential issue is a clogged spray head. Mineral buildup or coffee residue can block the spray head, causing water to back up and overflow. Descaling the coffee maker regularly is essential to prevent this. Also, verify the carafe is correctly positioned on the warming plate; improper placement can disrupt the brewing cycle.
Finally, ensure the filter is properly seated in the basket. A poorly fitted filter can allow grounds to escape and clog the system. Regular cleaning and proper usage will minimize overflow incidents.
Error Codes and Their Meanings
While the Black & Decker CM2046 Series 12-Cup Coffee Maker is a manual model, some variations or newer iterations might display error codes. Generally, this model doesn’t feature a complex error code system like fully programmable machines. However, a lack of power or inconsistent operation can indicate underlying issues.
If the unit fails to power on, first check the power cord connection and the outlet. A tripped circuit breaker could also be the culprit. Slow brewing might suggest mineral buildup, requiring descaling. Consistent overflow, as previously discussed, isn’t an error code but a symptom of improper use or maintenance.
For models with a digital clock, a flashing display could indicate a power interruption or a need to reset the clock. Consult the full user manual (if available) for specific troubleshooting steps related to your model’s features.
Safety Precautions
Always follow electrical safety guidelines and heed hot surface warnings. Proper handling prevents burns and ensures safe operation of your Black & Decker coffee maker.
Electrical Safety Guidelines
To ensure safe operation, always plug your Black & Decker 12-Cup Coffee Maker into a grounded electrical outlet. Never operate the appliance with a damaged cord or plug; if damaged, it must be replaced by a qualified technician.
Avoid using extension cords, but if absolutely necessary, choose one with an amperage rating equal to or greater than the coffee maker’s. Do not immerse the coffee maker, cord, or plug in water or other liquids; This poses a serious risk of electric shock.
Unplug the coffee maker from the outlet when not in use and before cleaning. Never pull the cord to disconnect the coffee maker; grasp the plug instead. Regularly inspect the cord for any signs of damage. Keep the appliance away from heat sources and flammable materials.
Hot Surface Warnings
Caution: During and immediately after brewing, surfaces of the Black & Decker 12-Cup Coffee Maker become extremely hot. Avoid touching the carafe, warming plate, and surrounding areas to prevent burns. Use the handle and knobs provided for safe operation.
Always allow the coffee maker to cool down completely before attempting to clean or disassemble it. Steam escaping from the brewing process can also cause burns; maintain a safe distance.
Keep the coffee maker out of reach of children. Supervise its use around individuals who may not be aware of the hot surfaces. The carafe is designed for use with the coffee maker only; do not use it on a stovetop or in a microwave. Exercise extreme care when handling hot coffee and the carafe to avoid spills and potential injuries.
Proper Usage and Handling
Ensure the Black & Decker 12-Cup Coffee Maker is placed on a stable, level surface before operation. Always unplug the appliance when not in use and before cleaning. Never immerse the coffee maker base in water or other liquids.
Use only the provided carafe with this coffee maker; substituting with other carafes may cause damage or injury. Do not operate the appliance with a damaged cord or plug. Avoid using extension cords.
Regularly inspect the coffee maker for any signs of wear or damage. Do not attempt to repair the appliance yourself; contact qualified service personnel for assistance. Handle the carafe with care to avoid breakage. Follow all safety precautions outlined in this manual to ensure safe and enjoyable coffee brewing.
Parts and Accessories
The Black & Decker CM2046 includes a carafe, filter basket, and removable parts. Replacement carafes and filters are often available for purchase separately.
Identifying Key Components
The Black & Decker 12-Cup Coffee Maker features several essential components for optimal operation. These include the water reservoir, clearly marked for water level indication, ensuring accurate brewing. The filter basket securely holds a standard paper filter or a reusable filter (sold separately).
The carafe, typically glass or thermal, collects the brewed coffee. A carafe plate keeps the coffee warm after brewing. The on/off switch initiates the brewing process, while the power cord provides electrical connection.
Some models include a brew strength selector, allowing for customization. The spray head disperses water evenly over the coffee grounds. Finally, the lid secures the water reservoir and prevents steam escape during brewing. Understanding these parts aids in proper usage and maintenance.
Replacement Parts Availability
Finding replacement parts for your Black & Decker 12-Cup Coffee Maker is generally straightforward. Carafes are the most frequently replaced component, readily available at major retailers like Walmart, Target, and Amazon. Online marketplaces, including the Black & Decker official website, also offer direct purchase options.
Filter baskets and lids are also commonly stocked, though availability may vary. Less frequently needed parts, such as the heating element or spray head, might require searching specialized appliance parts retailers.
When ordering, always verify the model number (CM2046 Series) to ensure compatibility. Generic replacement carafes may fit, but specific components are best sourced from Black & Decker or authorized dealers for guaranteed performance and safety.
Carafe and Filter Options
The Black & Decker CM2046 Series typically includes a glass carafe, designed to sit on the warming plate and keep brewed coffee warm. Thermal carafes, offering extended heat retention without a warming plate, are also available as replacements or upgrades for certain models within the series.
Regarding filters, the coffee maker utilizes standard #4 cone filters. Both paper and reusable (permanent) filter options are compatible, allowing users to choose based on preference and environmental considerations. Reusable filters eliminate the need for paper replacements, offering cost savings.
Ensure the carafe is properly seated before brewing to prevent spills. When replacing, prioritize carafes specifically designed for 12-cup coffee makers to guarantee a secure fit and optimal brewing performance.